

I know you want to know how to do this!
Luckily I did a tutorial ;D
Products used:
- Sugarpill Tako
- Sugarpill Afterparty
- Sugarpill Bulletproof
- Sugarpill Dollypop
- Sugarpill Poison Plum
Start with priming your eye with your favorite primer (never mind my lashes, I have some individual lashes from my previous look):

Then apply white base for the whole lid (NYX jumbo pencil Milk is what I used):

Take black pencil and draw a line starting from outer corner, going up like in the picture:
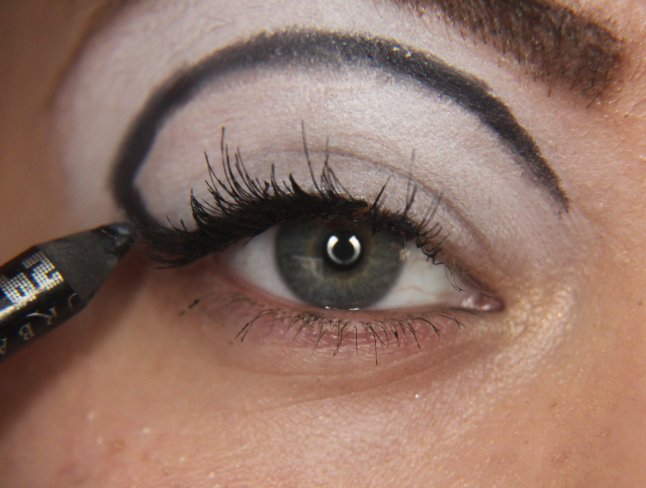
Do another line on lower lashline with black pencil:

Continue the upperline from the outer corner, and extend it all the way to upper lashline, so you'll get the black liner:

Like this.

(I extended the line in lower inner corner at this point too )Then apply some white to inner corner , as well as to the line-thingie you draw to the lower outer part:

Then take a small brush (mine is Make Up Store's 204), and apply Sugarpill Afterparty where the picture shows. At this point also darken the black pencil areas with Sugarpill Bulletproof:

Like this:

Then lots'n'lots of white, in my case Tako. To the highlight:


...And other parts that have white base:


So there:

Apply some more Afterparty, blend it with Tako:

.. and still a bit more Afterarty blended with Tako:

Then some Sugarpill Poison Plum (use primer here too. I didn't and it shows.):

Same thing with just under the brow. Blend with a hint of Dollypop and Tako:

So here's the look. I still thought something was missing...

So I added Illamasqua Debonair pencil to waterline, and Ardell false lashes. And darkened my brow to match the look:


Great tutorial! That looks amazing
ReplyDeleteBeautiful, great tutorial!
ReplyDeleteAwesome tut! Love it..! do more of these please! these are so much helpful..!
ReplyDeleteWow. So completely unique and amazing!
ReplyDeleteLovely! And a wonderful showcase of Sugarpill shadows!!
ReplyDeleteVery Unique!!!
ReplyDeletejust....unbelievable. *-*
ReplyDeleteLove your looks and thanks for the tutorial.
Wow, neat look!
ReplyDeleteThat is amazing!!! and I thought it would be that complicated! ^_^
ReplyDeletelike it, like it! Amazingly beautiful! :)
ReplyDeletethank you for this tutorial, it's just...amazing!
ReplyDeleteMaqnifique! I love it!
ReplyDeleteI really love this look...might have to try it out sometime!
ReplyDeleteGorgeous look, very Jangsara indeed! I'm goint to try this later :D
ReplyDeleteAmazing look!
ReplyDeleteVEry nice! well done! thanks for sharing!
ReplyDeleteLove it well done and thanks for the tutorial :D
ReplyDeleteVery nice tutorial! You are so creative :)
ReplyDeletehttp://confessionsofabeauty-holic.blogspot.com/
AWESOMEEEEEEEE!!!! <3
ReplyDeleteLove it! Super creative!
ReplyDeleteVery Beautiful!! great job! i love it!
ReplyDeletewonderful, perfect!
ReplyDeleteYay! More Jansara-esque stuff. :D I love this, it's so beautiful, especially since you stuck with mattes throughout too.
ReplyDeletevery interesting...
ReplyDeleteSimple beautiful and useful (thanks !!!)
ReplyDeleteReally love your tutorials!!!!
ReplyDelete